Your chatbot can provide up-to-date information to your customers and perform actions on their (or your) behalf. It’s possible with Chatwith when you connect your chatbot to an API. The chatbot can then formulate HTTP requests to the API based on your users’ requests and with it retrieve information or perform any action specified by the OpenAPI specification!
This approach is considered advanced because it usually requires an access to an API and some technical skills. You may have easier start with Actions using our no-code solutions like Webhooks.
Adding API as new Action
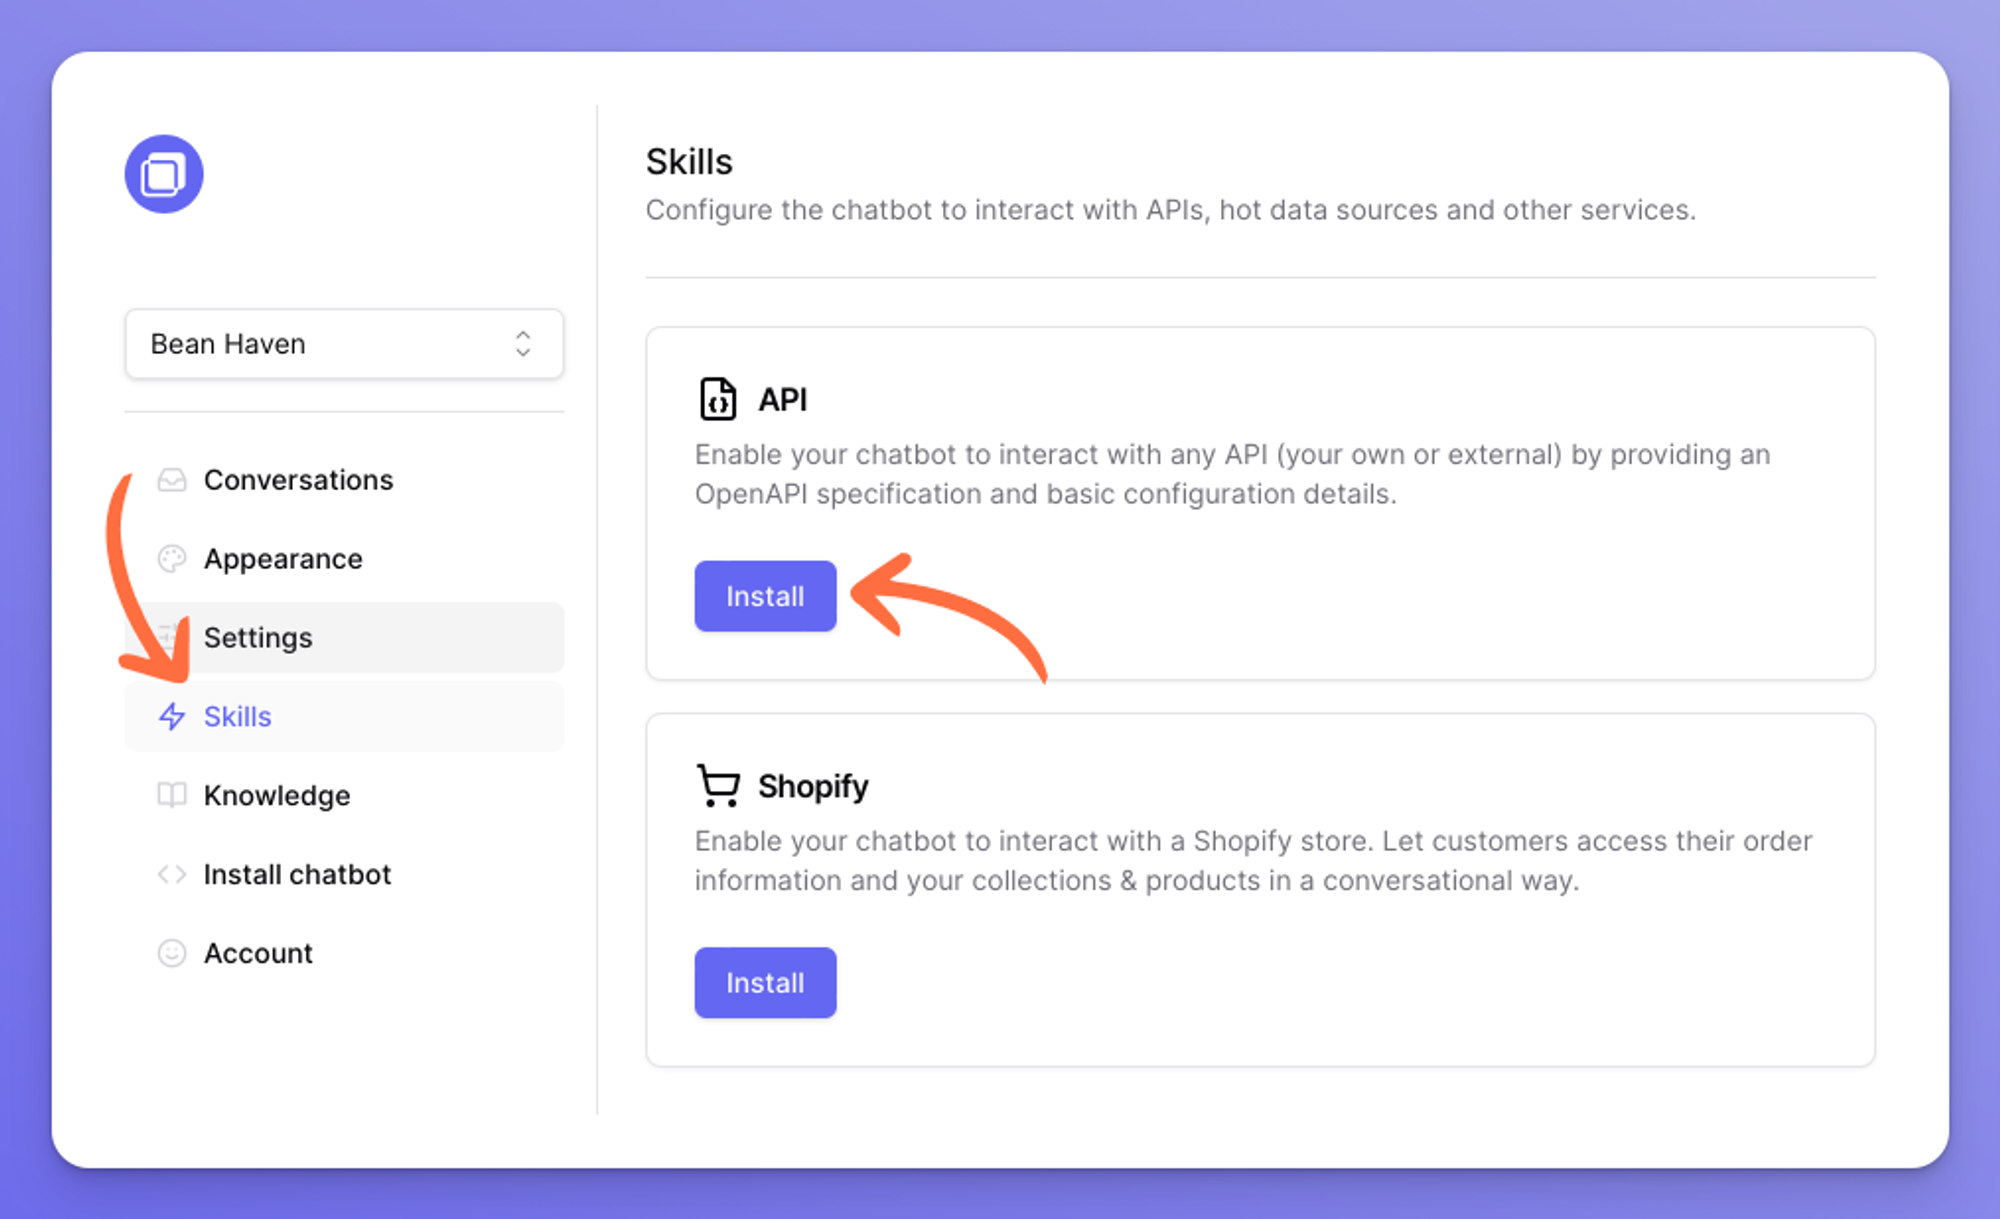
From the Chatwith dashboard, click on the 'Actions' button in the left sidebar. Then, click 'Install' on the 'API' skill card.

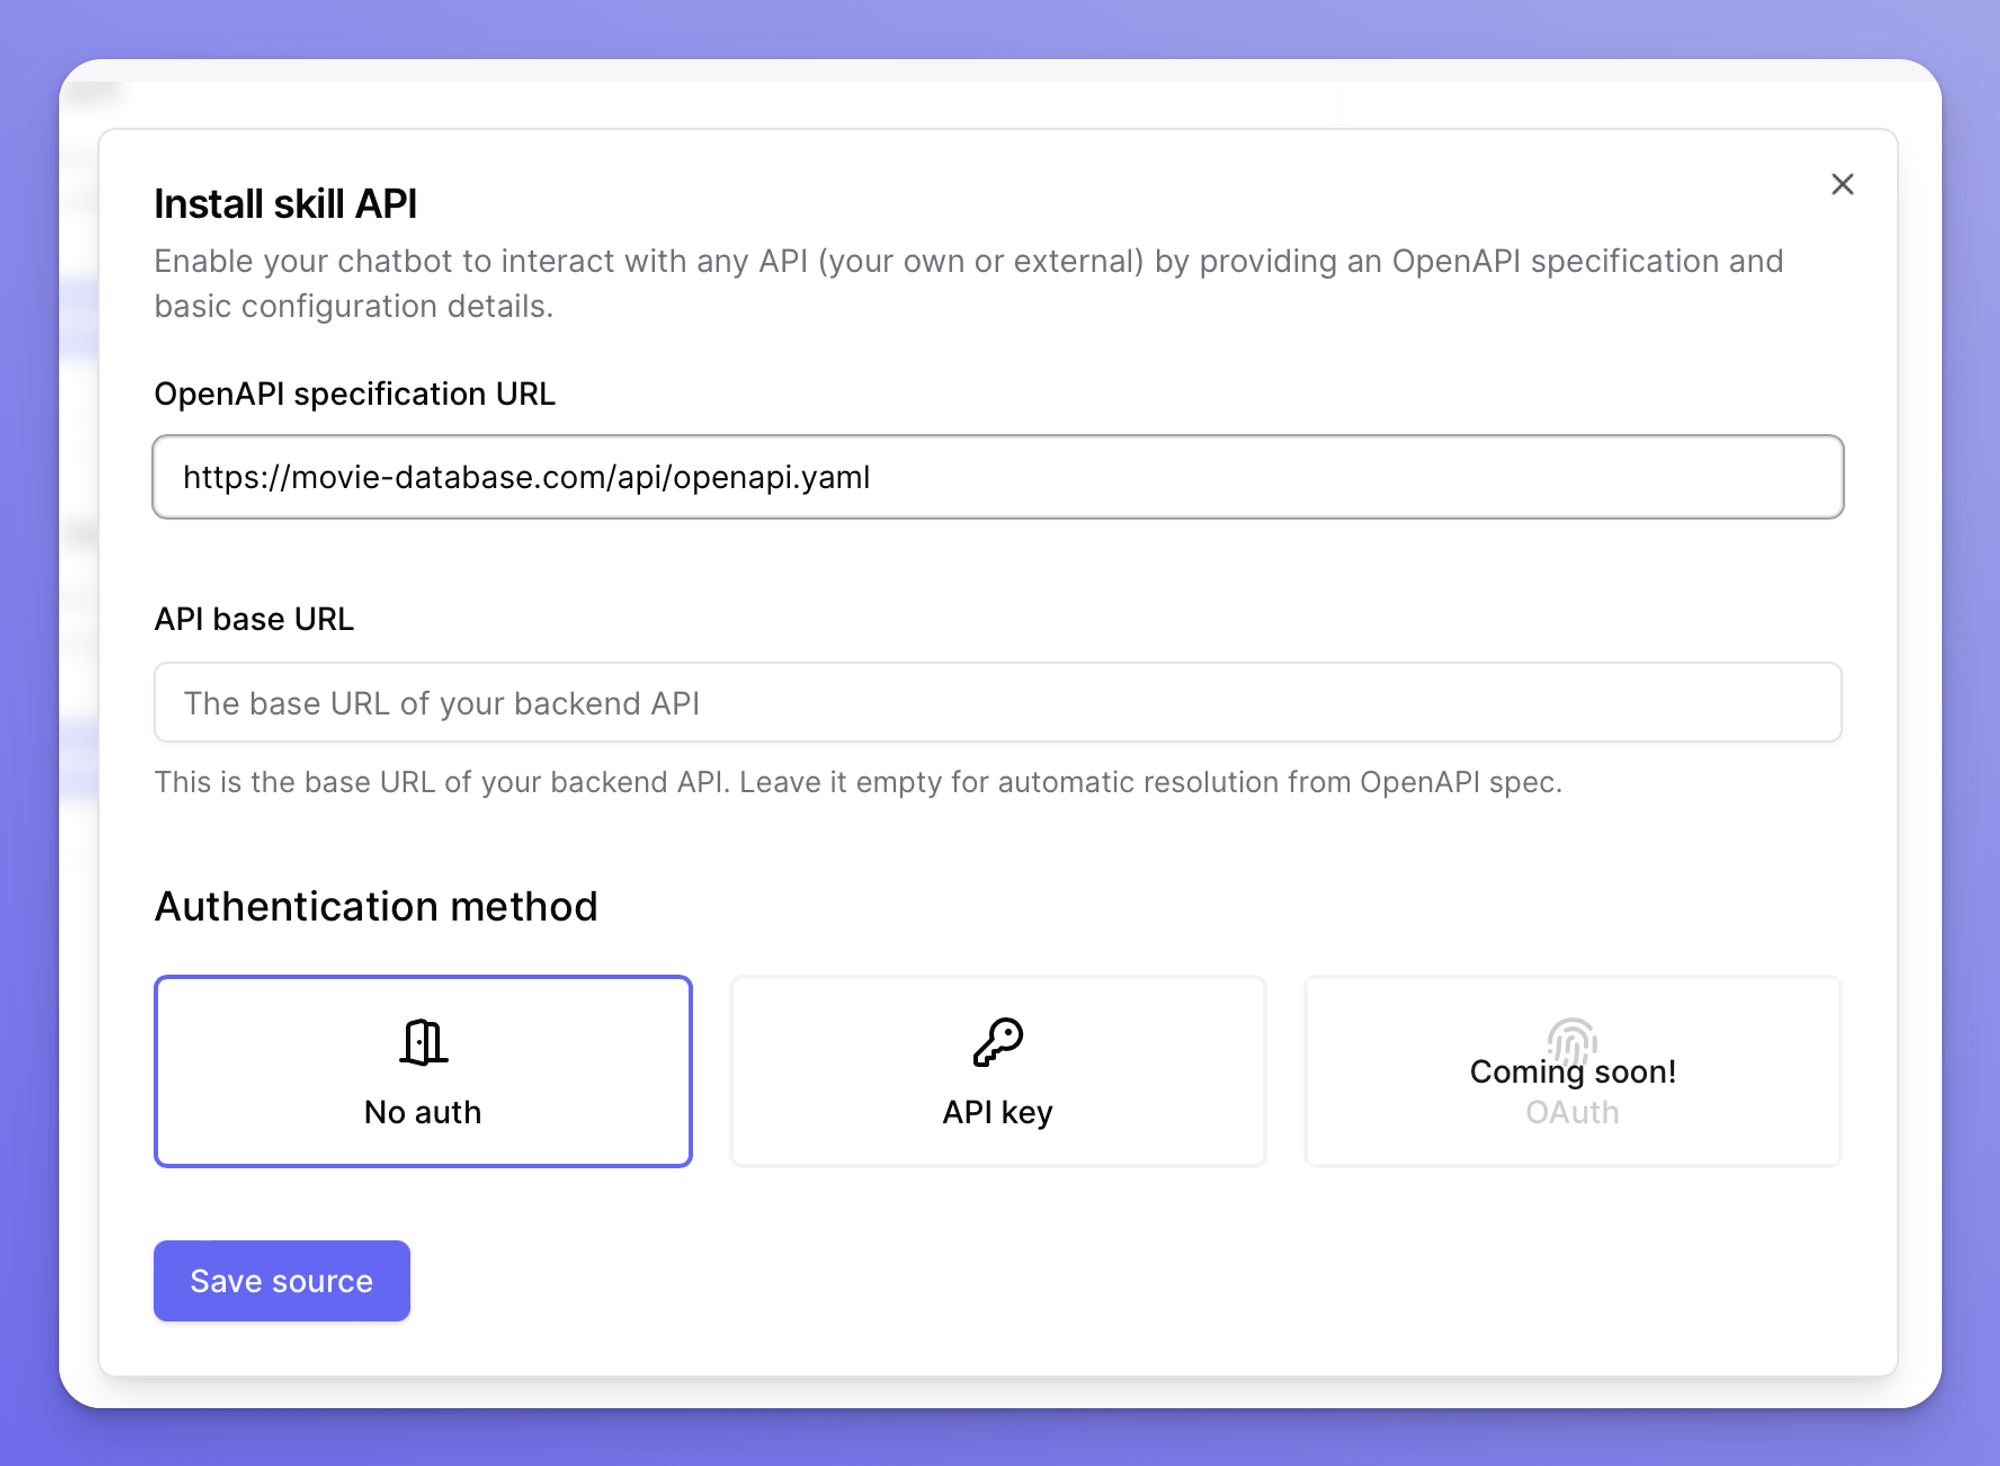
Follow the steps described in the popup that appears.
The most important (and the only required) field is the URL to the OpenAPI specification file.
Chatwith can handle OpenAPI spec files in both JSON and YAML/YML formats.
If your API requires additional authentication using API key you can specify it in the dedicated section.

Click ‘Save’ and your Action is immediately added and ready to use by your chatbot!
See this blog post for a more detailed and technical writeup with practical examples.
Troubleshooting
Creating Actions using REST API is an advanced approach which requires technical know-how. Because you’ll be connecting an external system (API) we have no prior knowledge of or control over, it is impossible to create a plug & play experience. That said, here are some tips for troubleshooting your Actions:
- Before using an API in Chatwith, make sure it works correctly when used directly in a HTTP client (eg. HTTPie, Postman, Hoppscotch etc)
- If you are sure the API works correctly, but you can’t make it work in Chatwith, try debugging the Action calls in the Conversation log:

- One of the most common and easiest issues to solve is wrong authentication. If your API uses Bearer Token authentication or custom headers, you will need to make sure to configure the header correctly. Please note that currently Chatwith supports only header-based authentication.
Please reach out to our support team if you have difficulties enabling API Actions! We can also help with custom implementation and API integrations.

